Interfacing, Lining,
& Underlining Intuitively
-the UA way
I started off eschewing and harumphing all traditional ways of interfacing & lining (well - I was right to detest polyester lining…). The first wool jacket I made for my mother I lined with a beautiful batik cotton. It was beautiful, but it didn’t exactly slide on or off the body well -properties I didn’t much care about in my strongly opinionated youth.
But function matters and is the difference between a beloved garment worn to smithereens or a gorgeous ocean green wool jacket that mostly hangs to this day gathering dust in my mama’s closet…
∞The Simplified UA Way∞
Linings - I prewash them ALL
The only ones I fool with:
Silk (habotai or charmeuse) 100% silk NOT poly (don’t be taken in by cheap “silk” look for the fiber content when purchasing)
I line everything almost exclusively in this option.
Silk comes in a range of weights*, colors -& patterns too if that’s your thing. It breathes and slides over the body so well.
*caveat - silk habotai is very thin. I often underline my jackets with it and call it a day. See underlining below to learn more.
Silk Cotton blend
A less expensive and also slightly thicker* option.
The combination of fibers of silk and cotton can also make it a bit warmer.
It has enough slid due to the silk to work well in jackets and coats.
I use it a lot for my little one’s jacket linings as well, it can take more of a beating than straight-up silk.
*silk thickness depends on mommes - what are mommes? The way silk weight is measured: the higher the momme, the heavier and stronger the fabric.
Bemberg/ Rayon
Bemberg is a type of rayon, sometimes called cupro, that is the better grade and quality synthetic to use as a lining.
*Rayon is made from cellulose matter, if you’re an enrolled student read more about Fiber, its production/ uses/ detriments in the Heirloom Wardrobe Course fiber segment or the Queen Robe Project fiber segment.
Rayon is made to have a silky hand to flow over the body - like a silk.
The weight is similar to a heavy charmeuse, though its drape isn’t as malleable or flowy. Most importantly to me - you can wash and dry it.
I prefer silk or silk cotton because I’m a lover of natural fiber, but bemberg has its place.
Interfacings
1st: What is interfacing?
It is a hidden piece of fabric either fused (glued with use of an iron) or sewn in to a garment to give a garment extra structure, stiffness, longevity of use, or a thicker less-yielding hand,
AND sometimes all four of those attributes at the same time.
I like to mostly think of interfacing as a trick to make sure I don’t wear or rub the fabric out before the rest of the garment’s time.
Think about the waistband and or closure on your tightly fitted pants, skirt, shirt placket, jacket (or fill in the blank) -it gets used back and forth many times a day, without interfacing or some kind of further care you’ll wear out the fabric of those areas before you have worn the rest of your piece to its end.
Read to the end for the other trick I have employed more times than I can count.
I have a long drawer in which I keep these 3 trusty interfacing pieces:
French Fuse Interfacing (it is both a knit & fusible) in black or white
If I have to use a fusible, this is the one I use, even in wovens when dealing with pocket welts, plackets etc. - I’ve found this knit fusible is the most trusty and least wrinkly/problematic of the fusible interfacings.
Fusible means it has a glue-like surface that you iron onto the backside/wrong-side of your apparel fabric.
Be careful here not to fuse it to your iron or outward-facing fabric side. I’ve used this interfacing when I begrudgingly need a sturdier or stiffer pattern piece for something that is going to get lots of wear - think button plackets, collars, pocket welts, some waistbands, or cuffs.
I use french fuse on both my knit and woven pieces.
I’ve had pieces in my wardrobe for 20 years and this interfacing is still going strong.
I recommend fusing the entire piece and not just the innards of an apparel fabric piece so that when you sew you are also catching the edge of the interfacing -that way it stays in place forever & doesn’t peel up and create a problem.
Stiff woven Interfacing (non-fusible)
I like a very very stiff woven interfacing for high collars.
I love a romantic high collar and I want it to often stand directly up and stay that way - this is my sewn-in interfacing that I use for that purpose.
Can also be used for creating stiff cuffs, pocket flaps, or very stiff button plackets. It depends on your design and needs.
If you’ve designed something that stands to attention, a linen, cotton, or silk apparel fabric won’t do that without some interfacing or underlining support.
I don’t have a brand that is tried and true because I hunted around and bought 3 yards 15 years ago and it’s all I’ve ever needed.
Go on the hunt, ask folks to send you a 1/4 yard - try making a couple collars or simple sleeve cuff and give them a wash - see how it does. Find your dream stiff woven and buy several yards so that you’ve got it on hand for years to come.
*A word on fusible woven interfacings: I don’t use them. I find they shrink, move, wrinkle, and piss me off in a way that can ruin everything. This is my experience -it doesn’t mean it’s the only one. (See photo below after the Underlinging segment of the backside of my silk/wool blazer in which I used woven fusible interfacing in the collar. It’s puckery. Rrrrr.)
Silk Organza -as interfacing
Silk Organza is a wonder fabric.
It can be the most voluminous glorious gown but it can also be a mighty fine interfacing.
Silk Organza is lightweight, has structure while also being supple, and can give the right amount of support to most any lighter-weight project.
It’s a natural fabric - it can breathe, be washed, and stand the test of time. Not all organzas are woven equally.
For use as an interfacing, I recommend a tightly woven nicely made organza - aka - not the cheapest you can find nor whisper-weight.
Make sure it is silk and not synthetic. Throw in a couple basting stitches when using it so it doesn’t slip around.
∞ & My Quick Unstructured Button Placket/ Buttonhole Trick:
-I love unstructured pieces. I like to sew without a lot of fuss too - so I often use a piece of the selvedge (tightly woven finished edge) of my garment fabric to be the reinforcement of a buttonhole, and for the spot I sew the button on as well. This acts like an unofficial interfacing agent thickening and reinforcing a spot that will get a lot of wear and tear. This is also why I don’t need lots of interfacing types in my repertoire. I use a piece of the apparel fabric that I’m working with & it works well for button holes, hooks and eyes, etc. 80% of the time.
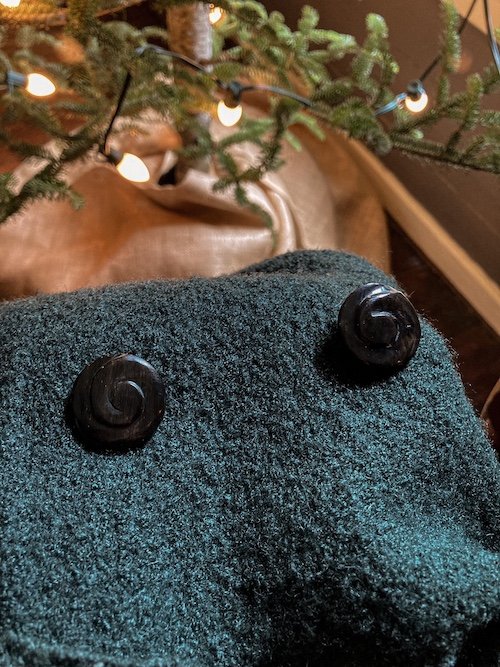
In order: the buttoned-up coat, the inside of the buttonholes where I’ve used some excess wool boucle as the informal “interfacing”, the front side of the buttonholes, the buttons, the inside of the buttons - (you can see where I have a little extra bit of boucle fabric hanging out, I’m still deciding if this coat should have a 3rd button and buttonhole or if I should clip off the tail). See the finished coat at the end of this post.
Underlining/ Interlining
Silk (habotai) ALWAYS Pre-Washed
(Washing knocks the slipperyness of silk back a bit making it easier to sew - I have lots of other reasons for prewashing too - read about them in the course.)
Underline: Because I personally love an unstructured feel for most of my pieces, I’ve taken to underlining my bespoke suit jackets/ coats.
This means I lay my cut out apparel fabric pieces and the lining on top of one another and serge them together.
Zig-zagging or just sewing the outer edges works too if you don’t have a serger.
I normally use silk habotai for a light weight piece or silk charmeuse if I want it a bit heavier. Serged, I then treat them as one piece.
Huge bonus: I can let my piece in and out very easily because it’s not made with a separately lined shell. This saves time and sanity and lets my pieces stay in rotation regardless of whether I’m up a size or down a size.
My 7 year old underlined silk/wool plaid jacket.
I wear this piece to death. It’s underlined with pale blue silk habotai.
You can see the serged edges and the center back where I can take it in or let the jacket out.
You can also see the wee bit of puckering on the back of the collar (picture 2) from using a woven fusible. Arrrrggh. 3rd pic is of the jacket on the hanger, it’s hung with its matching pedal pusher knicker-breeches. Cute AF.
You can also see it’s a bit crumpled and that I don’t mind it - it follows my theme of the GentleWoman Farmer. (-We delve into personal themes in segment II & III of the UA Heirloom Wardrobe Course.)
Cotton flannel Interlining (for heavy-duty coats and jackets)
Interline: This gives warmth & added wind protection to a heavy coat or jacket. Underline your individual pieces. This is a sandwiched inner layer between your coat apparel fabric and your lining. I prefer cotton flannel that I, you guessed it, prewash.
Horsehair Interlining (for fancy bespoke suit making. Think fine lapel roll etc. - don’t know what I’m on about? You don’t need it…)
Interline: Stiff and rough, you can’t beat it for proper bespoke suit lapel, collar, and shoulder cap making.
You baste this stuff in and use it to make fabric roll, drape or stiffen with dapper-ness.
Tailoring is a whole other ball of wax. I don’t get into it much because I like my things to be less formal most of the time.
I do keep a bit of horsehair around for suit-making whims.
Horsehair was originally made from, you guessed it, horsehair.
Today fine types do have a percentage of “hair” in them (typically goat) with a blend of cotton, rayon, and wool. There are synthetics available without hair in them as well.
I have a 3 piece suit cut out to make for the dapper love of my life. It will use something from all 3 of these categories: lining, interfacing, & interlining. I’ll bring you along and make a journal post as I make it, hopefully sometime this century. You’ll see where I put in the horsehair and how I interface & line it as well.
Moral: Figure out what you are comfortable with and do that. No shame in using a bit of selvedge & nothing else to achieve your means.
Wool boucle coat using its own fabric for my cheap, quick & useful interfacing needs.


